前書き
本記事では、以下のラボメン限定アクセスで使えるようになっているGoogleログインして使える秘書GPTを自分自身で開発する方法をご紹介します:
https://agi-labo.com/articles/n6bebd29c32e6
今回のnoteでは、主に以下のようなコンテンツが掲載されています:
Action(OAuth)によるGoogleログインの設定の仕方
GoogleカレンダーとGPTsの連携方法
コピペで使える2584文字のYAMLファイル
GASでの実装との違い
コーディングをする必要が無い
Googleアカウントでログインするので自分以外のユーザーも利用できる
GASと併用もできる
カレンダーを操作できるGPTを公開出来て(不特定多数に公開するにはGCPからの認可が必要なので現状は厳しいかも)、作ったGPTを複数人で使ったりできるのがメリットです。
また、OpenAPIの仕様さえ書くことができれば楽に他のGoogleアプリも追加できるのもメリットです。
それでは前置きもこの辺りにして、実装方法について解説していきます。
それでは解説に入っていこうと思います。
Googleカレンダー連携の実装は以下のステップが必要です。
実装の手順
GCPの新規プロジェクトを作成(未登録の人は新規登録)
GCPのスコープを設定する
ChatGPTのGPT Builderの設定をする
実際にログインしてみる
1.GCPの新規プロジェクトを作成(GCP未登録の人は新規登録)
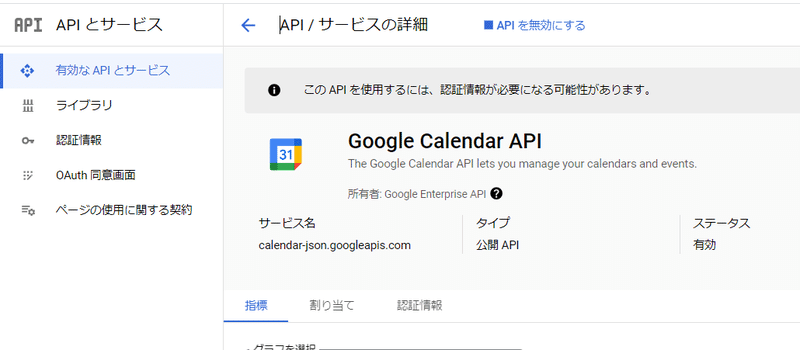
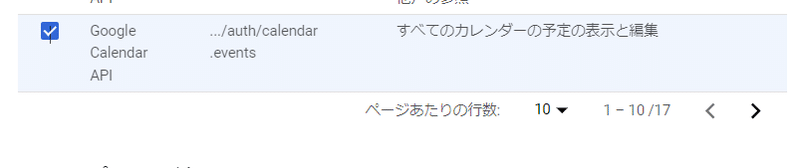
2.GCPのスコープを設定する
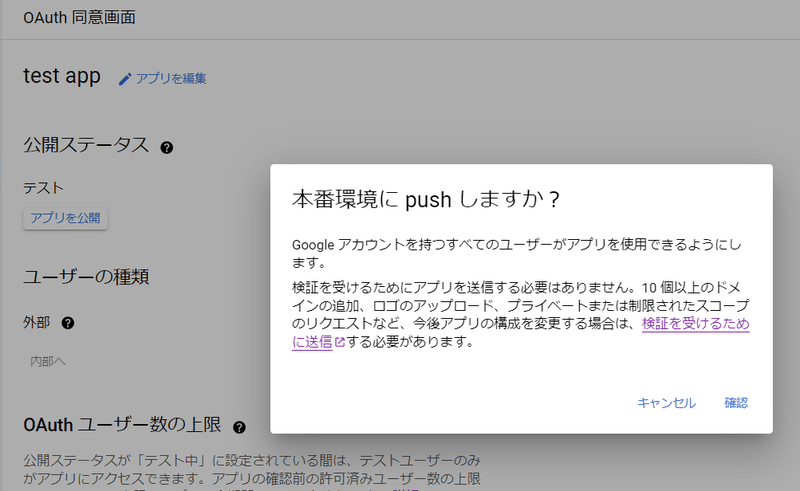
ダッシュボードに戻るを押した後、OAuth同意画面をクリックしアプリを公開→確認を選択
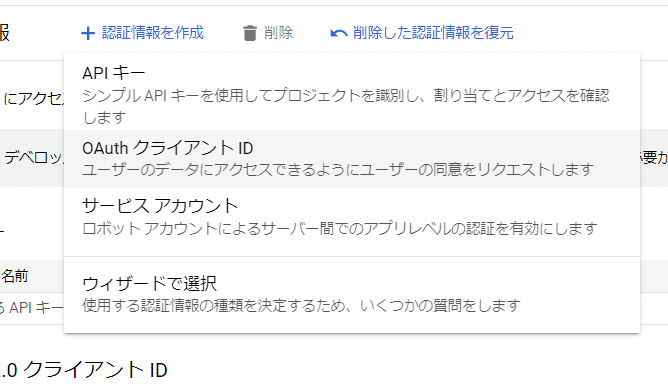
次はメニューバーから認証情報を選択
アプリケーションの種類:ウェブアプリケーション
承認済みのJavaScript生成元:https://chat.openai.com
承認済みのリダイレクトURI:https://chat.openai.com
を入力して作成
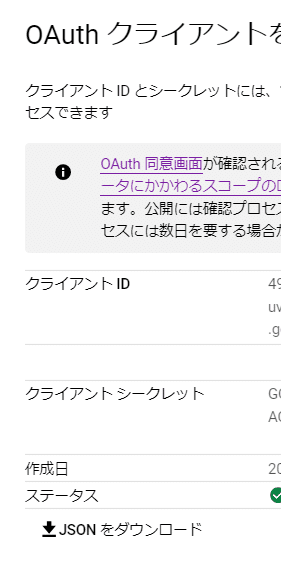
表示されるクライアントIDとクライアントシークレットをメモ
※JSONのダウンロードもすることを推奨
3.ChatGPTのGPT Builderの設定をする
まずGPTsを新規作成する
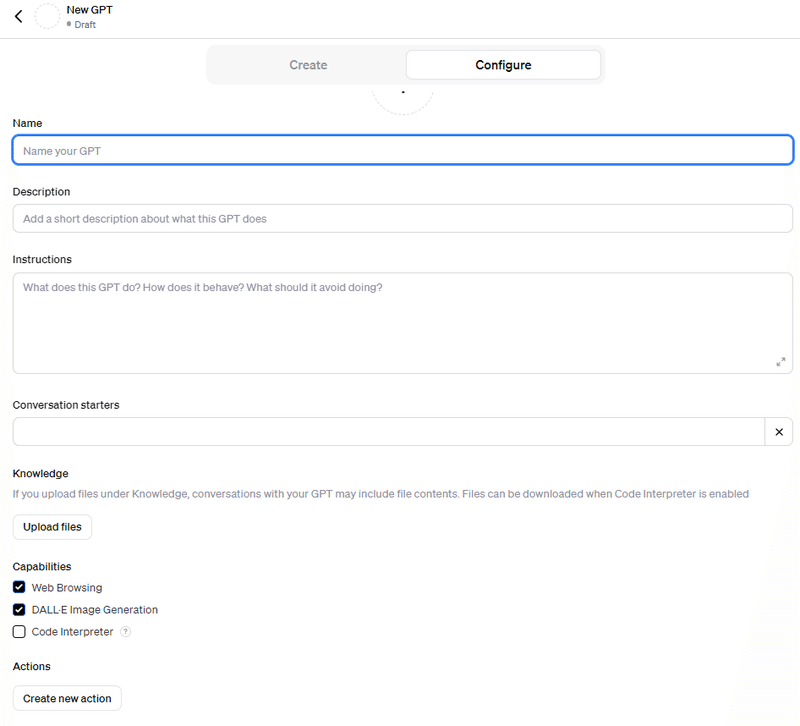
以下のyamlをSchemaに貼り付ける
openapi: 3.1.0
info:
  title: GPT Google Services Integration
  version: 1.0.0
servers:
  - url: https://www.googleapis.com
paths:
  /calendar/v3/calendars/primary/events:
    get:
      summary: List events from a calendar within a specific time range
      operationId: listCalendarEvents
      parameters:
        - name: calendarId
          in: path
          required: true
          schema:
            type: string
        - name: timeMin
          in: query
          required: false
          schema:
            type: string
            format: date-time
          description: The minimum time an event starts to be returned. Specified as an RFC3339 timestamp.
        - name: timeMax
          in: query
          required: false
          schema:
            type: string
            format: date-time
          description: The maximum time an event starts to be returned. Specified as an RFC3339 timestamp.
    post:
      summary: Create a new event in a calendar
      operationId: createCalendarEvent
      parameters:
        - name: calendarId
          in: path
          required: true
          schema:
            type: string
      requestBody:
        required: true
        content:
          application/json:
            schema:
              type: object
              properties:
                summary:
                  type: string
                start:
                  type: object
                  properties:
                    dateTime:
                      type: string
                end:
                  type: object
                  properties:
                    dateTime:
                      type: string
      responses:
        "201":
          description: Event created
  /calendar/v3/calendars/primary/events/{eventId}:
    put:
      summary: Update an existing event in a calendar
      operationId: updateCalendarEvent
      parameters:
        - name: calendarId
          in: path
          required: true
          schema:
            type: string
        - name: eventId
          in: path
          required: true
          schema:
            type: string
      requestBody:
        required: true
        content:
          application/json:
            schema:
              type: object
              properties:
                summary:
                  type: string
                start:
                  type: object
                  properties:
                    dateTime:
                      type: string
                end:
                  type: object
                  properties:
                    dateTime:
                      type: string
      responses:
        "200":
          description: Event updated
    delete:
      summary: Delete an event from a calendar
      operationId: deleteCalendarEvent
      parameters:
        - name: calendarId
          in: path
          required: true
          schema:
            type: string
        - name: eventId
          in: path
          required: true
          schema:
            type: string
      responses:
        "204":
          description: Event deleted
components:
  schemas:
    CalendarEvent:
      type: object
      properties:
        id:
          type: string
        summary:
          type: string
        start:
          type: object
          properties:
            dateTime:
              type: string
        end:
          type: object
          properties:
            dateTime:
              type: string

securitySchemes:
  OAuth2:
    type: oauth2
    flows:
      authorizationCode:
        authorizationUrl: https://accounts.google.com/o/oauth2/v2/auth
        tokenUrl: https://oauth2.googleapis.com/token
        scopes:
          https://www.googleapis.com/auth/calendar.events: Manage your calendar events
security:
  - OAuth2: []
Authenticationの歯車をクリックして、設定を以下のようにする
Client ID:先ほどメモしたクライアントID
Client Secret:先ほどメモしたシークレットキー
Authorization URL:https://accounts.google.com/o/oauth2/auth
Token URL:https://oauth2.googleapis.com/token
Scope: https://www.googleapis.com/auth/userinfo.email
を入力し、
最後にBasic authorization headerを選択しSaveをクリック

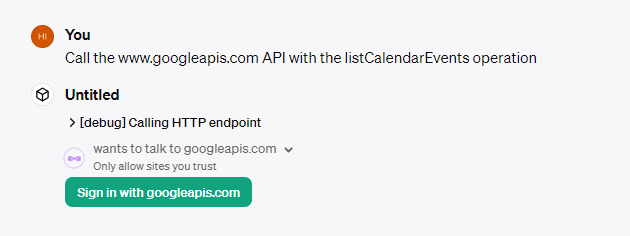
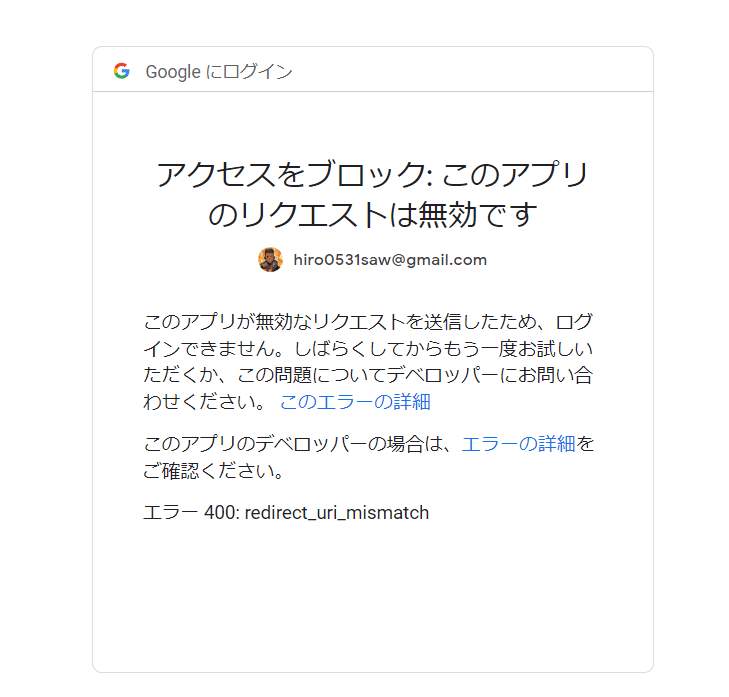
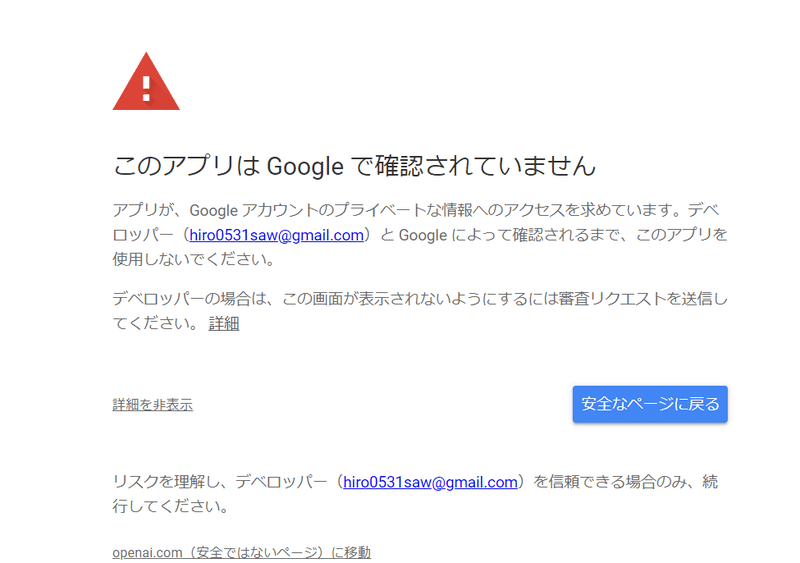
Sign in with googleのボタンを押すと、次のようなエラー画面が出ますが問題ありません。
※ここで違うエラーが出た方は設定が間違っている可能性があります。
401の場合はclient IDとシークレットキーのコピーミスの可能性があるので再度コピペしなおしてください。
このアプリのデベロッパーの場合は、の方のエラーの詳細をクリック
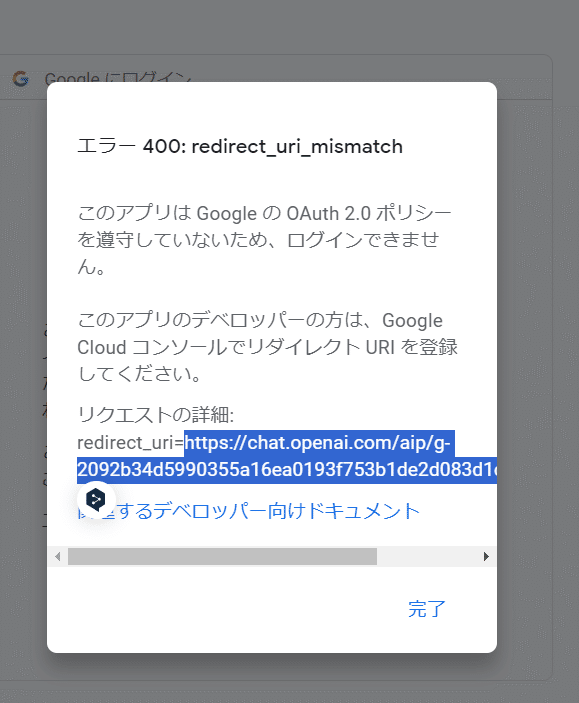
redirect_uri=以下のURLをコピーして、GCPの画面に戻る。
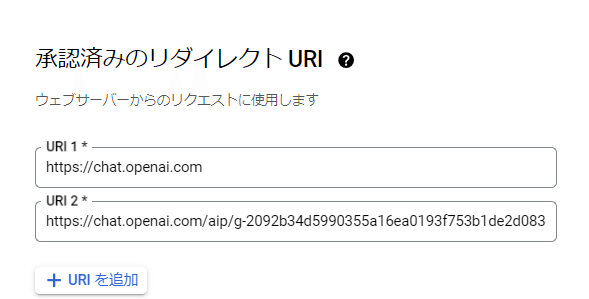
承認済みのリダイレクトURIにコピーしたURIを追加して保存
4.実際にカレンダーの操作をしてみる
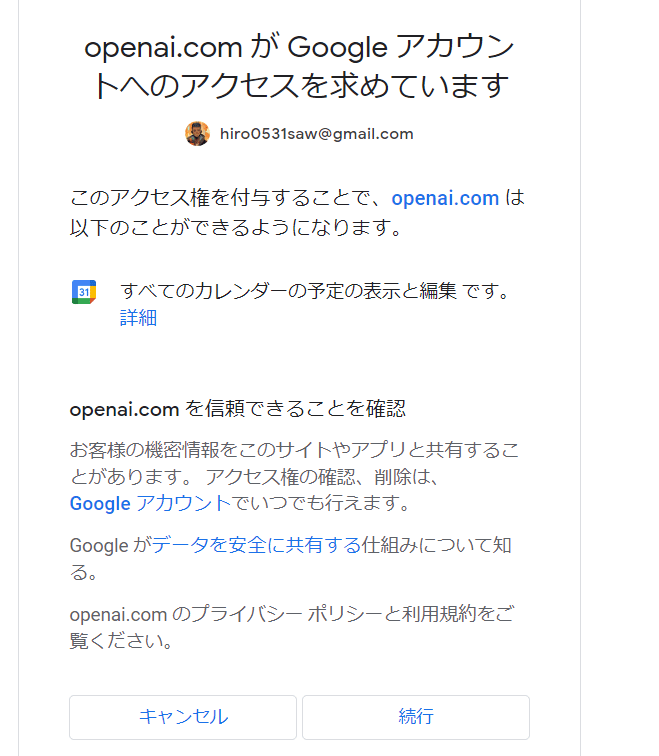
再度ログイン操作をするとこのような画面が出てきますが、これはGCPのアプリを承認していない場合出てくる画面なので実装には影響ありません。
一度GPTsの設定画面に戻るので、再度testボタンで起動
※ここでエラーが起きた場合はGCPのredirect_urIを消して再度ログイン、そこで表示されたurIを入力して保存する等操作をやり直すと解決する場合があります。
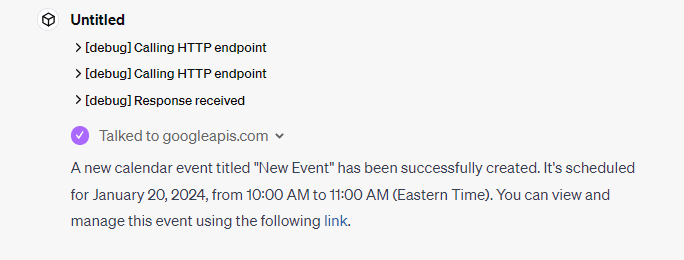
カレンダーリストの取得は情報が多すぎてエラーが出る場合があるので、カレンダーを作成を試してみてください。カレンダーリストの取得はプロンプトで「今週の予定」などで狭めた範囲を取得するように指示した上で日本時間に指定するとうまくいきます。
実際の秘書GPTのRulesの部分を公開するので、こちらでカレンダーの時間設定を日本の時間にしてみてください。
###Rules
Since you are expected to be used in Japan, all conversations should be in Japanese.
Also, when dealing with time stamps and other time-related matters, please be sure to use Tokyo standard time.
あとがき
これでGPTsにカレンダーを連携させて公開することができます。
予定の調整や削除もできるので、雑に「その会議明日の◯時に変えておいて」と言ったら変えておいてくれるのは結構便利で使ってます。
Gmailとの連携の方法とSchemaもまだご紹介するのでお楽しみに!